
How to Create a Page in WordPress and Elementor
In today’s digital age, having a well-designed and functional website is crucial for any business or individual. WordPress, one of the most popular content management systems, offers a robust platform for creating and managing websites. To enhance the design capabilities, many users turn to Elementor, a powerful page builder plugin for WordPress. This article will explore the steps to create a page using both WordPress and Elementor, providing you with the tools to build stunning and effective web pages.
Creating a page in WordPress involves a straightforward process that allows you to add content, images, and other media to your website. The WordPress editor offers a user-friendly interface for beginners and experienced users alike. On the other hand, Elementor takes page creation to the next level with its drag-and-drop functionality, making it easier to create visually appealing and highly customized pages. Whether you’re creating a simple blog post or a complex landing page, understanding how to use these tools effectively is essential for maximizing your website’s potential.
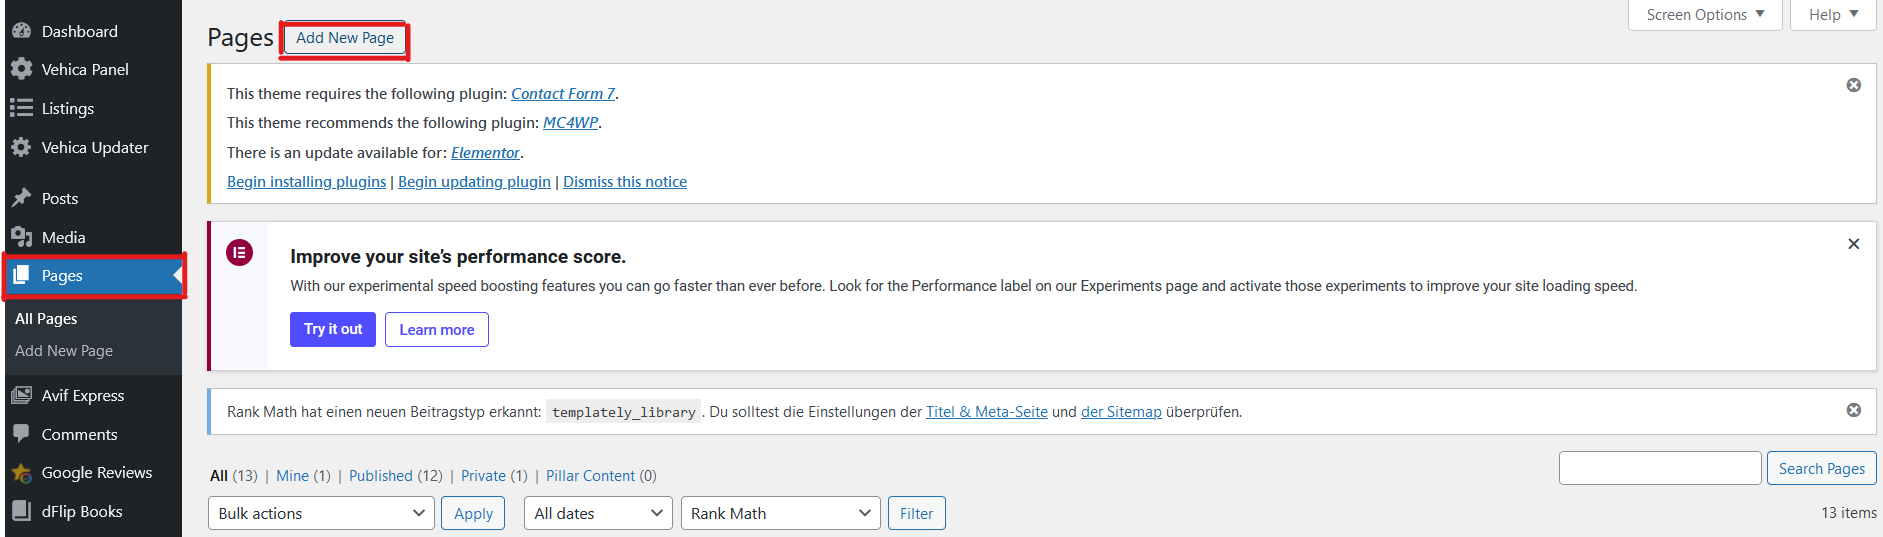
WordPress: How to Create a Page
To create a page in WordPress, you need to follow these steps:
- Log in to your WordPress dashboard.
- Go to the Pages section.
- Click on Add New.
- Use the provided interface to create a new page.
- When you are done creating the page, you can save it as a draft or publish it. (You can always edit published pages later.)
Create a Page with Elementor
To get started, you need to familiarize yourself with Elementor by following this link.
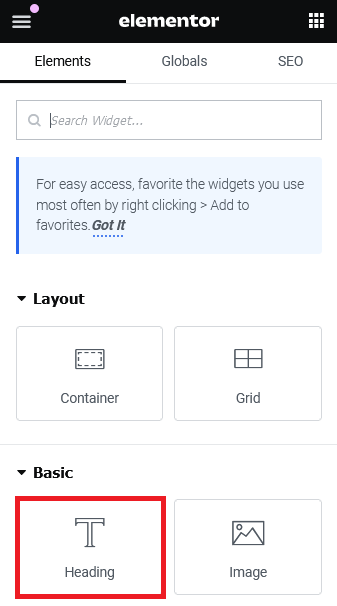
Building blocks
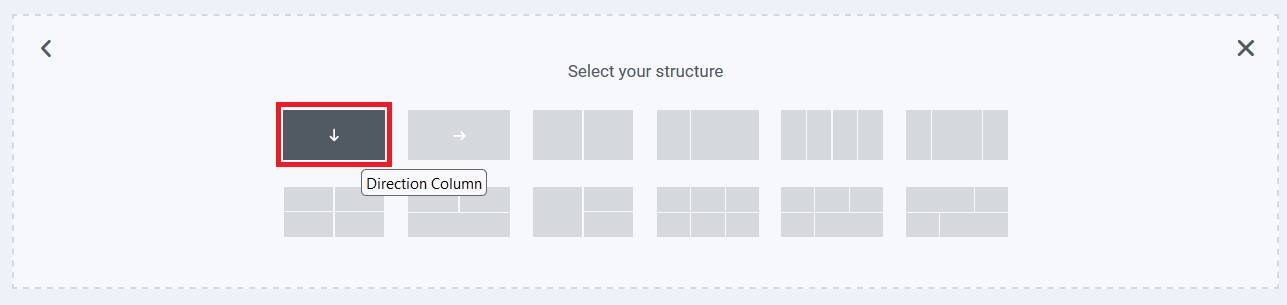
Pages in Elementor are built using three main building blocks:
- Sections: the largest building blocks that house the content inside columns.
- Columns: sit inside of Sections and house Widgets.
- Widgets: are placed inside Columns and are functional site components.
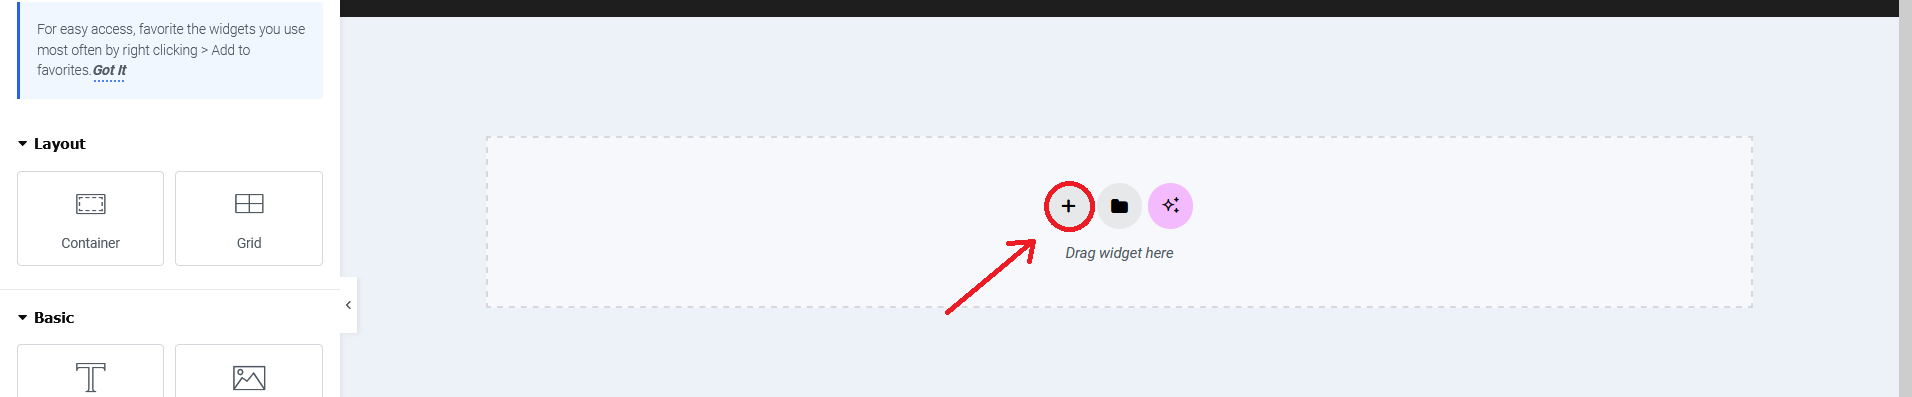
Let's Begin Creating
It's time to dive in and get started by building a "Hero section." Hero sections are large, prominent elements usually located at the top of a page, designed to grab visitors' attention and keep them engaged.
A successful hero section begins with an impactful image, video, or slideshow. For this example, we'll use a photo. Right-click the image below to save it to your desktop, as we'll be adding it to your site shortly.

Step 1: Use Sections to Build Your First Page
Right-click on this image and save it for the hero section.
Creating the Section
Now, let’s create the section that will become your hero section.
- Click the "Create a Section" icon (the "+" icon).
Step 2: Adding the Hero Image
Let’s add the image to your hero section. We'll add the image as a background to ensure it fills the entire section.
- After creating the new section, the left-side panel should switch to the "Edit Section" panel. If it doesn’t, click the dot icon in the blue tab above the section.

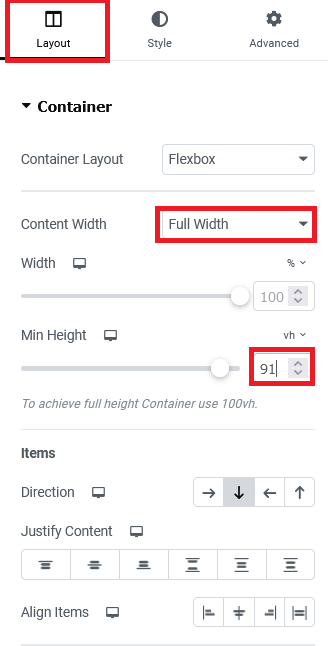
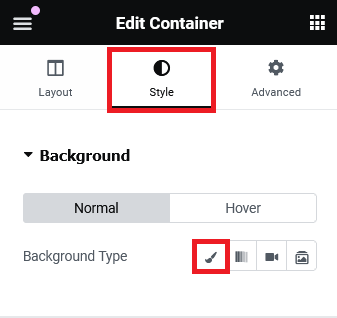
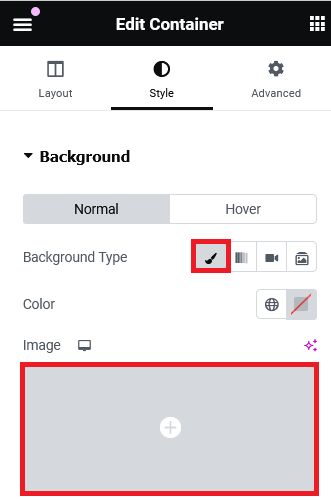
Step 3: Setting Up the Background Image
Navigate to the "Style" tab to add the background image. Select "Classic" background type, and then click the image icon to open your media library.
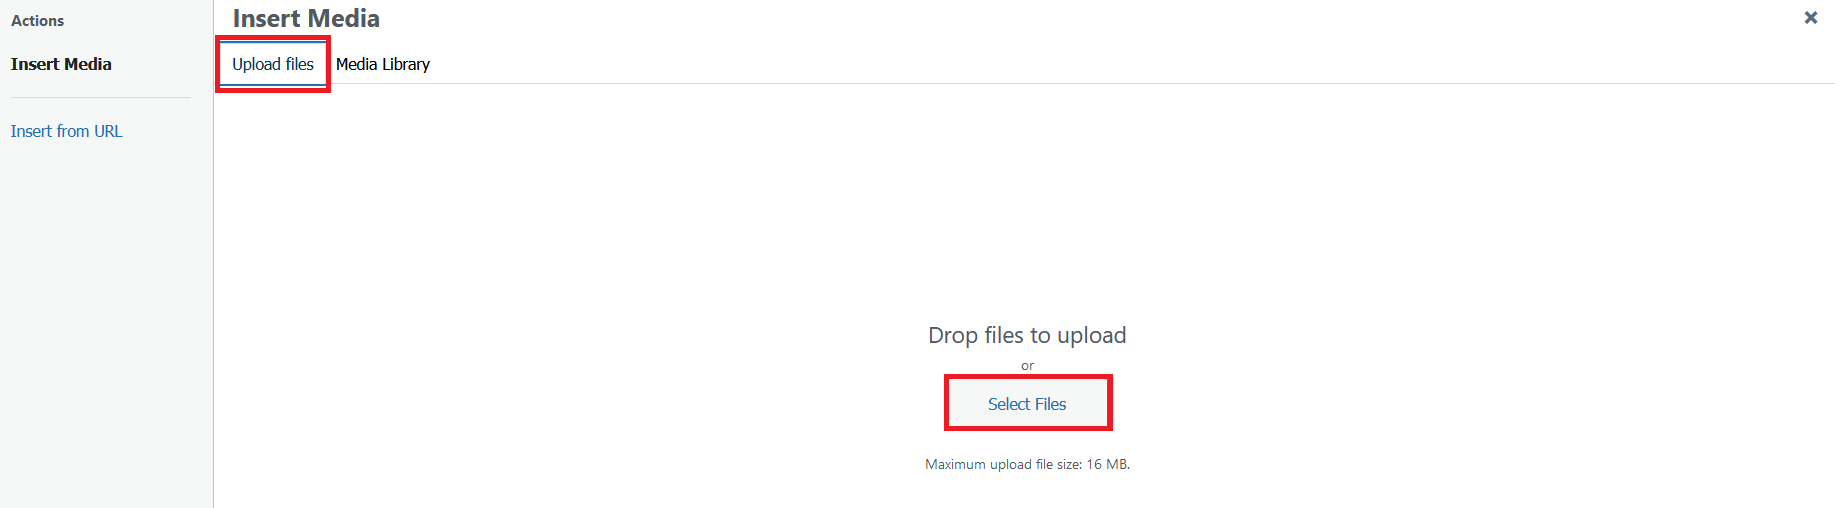
- Upload the image you saved earlier to your media library by clicking "Upload Files," selecting your file, and clicking "Open." It’s recommended to add Alt Text and a caption for better SEO and accessibility before inserting the media.
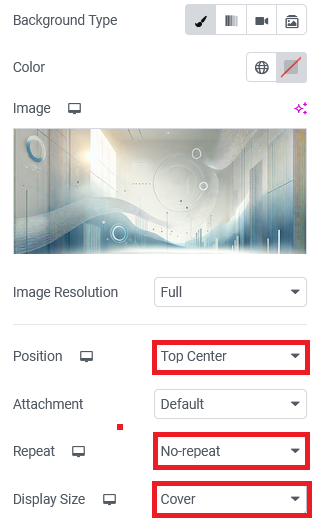
Step 4: Positioning the Background Image
Position the background image to the top center, set "Repeat" to "No-repeat," and "Size" to "Cover" to ensure the image covers the entire section.
Step 5: Adding a Heading
Next, add a heading to complete your hero section. Click the widget icon to open the widget panel, then drag and drop the "Heading" widget into the section.
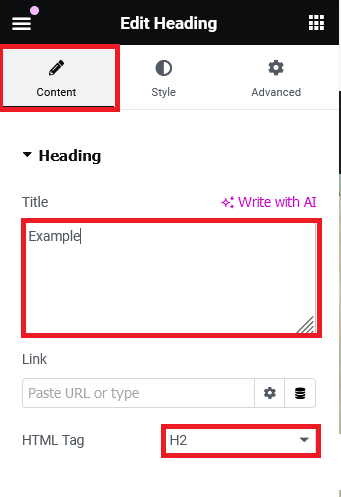
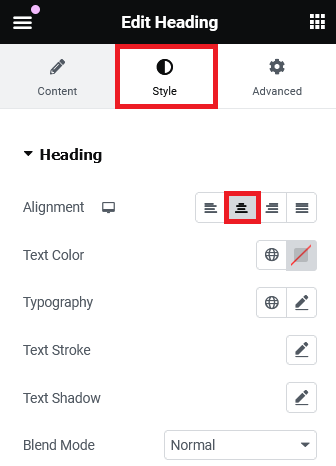
Type "The Art of Baking" into the title box and center the text alignment.
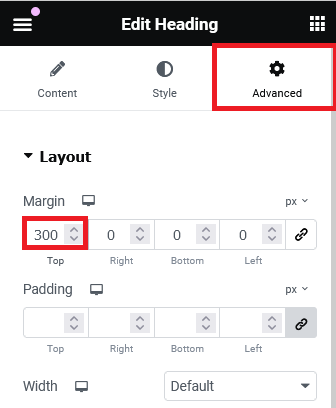
Step 6: Adjusting the Heading Position
To move the heading text to the top of the section, adjust the margins in the "Advanced" tab. Unlink the margins and set the top margin to -300.

Publishing Your Work
Click "Publish" to save your page.
Final Thoughts
This is just the beginning of what you can achieve with Elementor. You can continue building sections below the hero to complete your page, apply a website kit for more design ideas, or explore creating a full site structure with the Theme Builder. For more resources, visit the Elementor Academy. If you need assistance, contact our Support Center.
« Back
